Cherry pie is a classic dessert that’s simple to make, especially when using canned cherries. This guide will teach you how to master a canned cherry pie recipe, from preparing the flaky crust to creating a rich, perfectly sweet filling. Whether you’re a beginner or an experienced baker, this recipe ensures success every time. Let’s get started on crafting a homemade cherry pie that will impress everyone!
Table of Contents
Ingredients and Tools

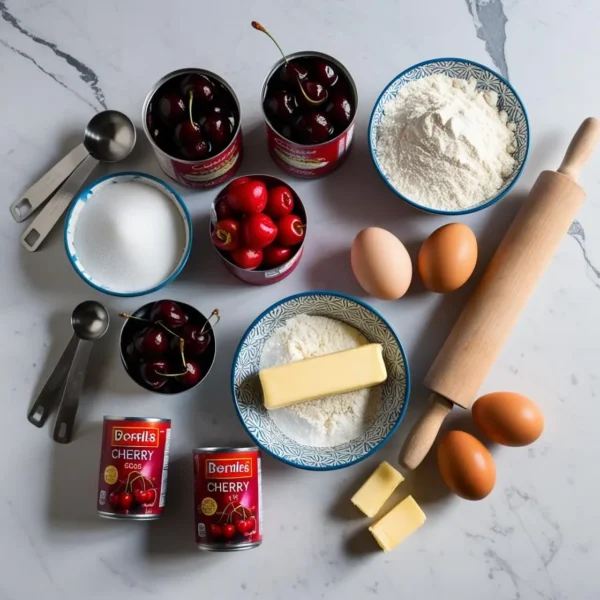
To make the perfect Canned Cherry Pie Recipe, gathering the right ingredients and tools is essential. Here’s everything you need
Ingredients
For the Filling:
- Canned cherries (15-20 oz cans): 2 cans, drained (reserve the juice for later). Learn about tart cherry juice benefits for alternative ideas!
- Granulated sugar: ¾ cup (adjust based on your desired sweetness).
- Cornstarch: 3 tablespoons (for thickening the filling).
- Lemon juice: 1 tablespoon (to balance the sweetness).
- Vanilla extract: 1 teaspoon (for added flavor).
- Almond extract: ½ teaspoon (optional but enhances the cherry flavor).
For the Pie Crust:
- All-purpose flour: 2 ½ cups.
- Unsalted butter: 1 cup (cold and cut into small cubes).
- Salt: ½ teaspoon.
- Ice water: 5-6 tablespoons.
- Egg wash: 1 egg beaten with 1 tablespoon of water (for a golden crust). Want more variations? Check out mini pancakes ideas for a fun brunch pairing.
(If you’re short on time, you can use a store-bought pie crust.)
Optional Toppings:
- Whipped cream
- Vanilla ice cream
- Powdered sugar for dusting
Pro Tips:
- Chill your butter and dough: Cold butter ensures a flaky crust.
- Drain canned cherries properly: Excess liquid can lead to a watery filling.
- Prepare ahead: Both the crust and filling can be made in advance and refrigerated.
With your ingredients and tools ready, you’re all set to begin. In the next section, we’ll cover how to make the perfect pie crust step-by-step. Let me know when you’re ready!
Preparing the Pie Crust

A perfect cherry pie starts with a flaky, buttery crust. Whether you’re making it from scratch or using store-bought dough, this section will guide you step by step.
How to Make a Homemade Pie Crust
1: Mix the Dry Ingredients
- In a large mixing bowl, combine 2 ½ cups of all-purpose flour with ½ teaspoon of salt.
- Whisk them together to evenly distribute the salt.
2: Cut in the Butter
- Add 1 cup of cold, cubed unsalted butter to the flour mixture.
- Using a pastry cutter or your fingertips, mix until the butter pieces are pea-sized. This creates layers in the dough, ensuring a flaky texture.
3: Add Ice Water
- Gradually add 5-6 tablespoons of ice water, one tablespoon at a time.
- Mix gently with a fork after each addition until the dough starts to come together. Be careful not to overwork it.
4: Form and Chill the Dough
- Gather the dough into two disks, one slightly larger for the bottom crust and a smaller one for the top.
- Wrap each disk in plastic wrap and refrigerate for at least 1 hour. This helps the gluten relax and keeps the butter cold.
Rolling Out the Dough
Step 1: Prepare Your Work Surface
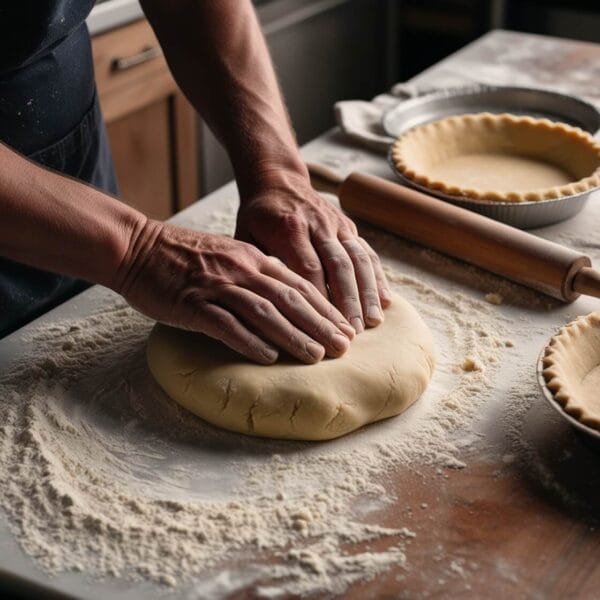
- Lightly flour your countertop and rolling pin to prevent sticking.
- Take the larger dough disk out of the fridge and let it sit for 5 minutes to soften slightly.
2: Roll the Bottom Crust
- Roll the dough into a 12-inch circle, about ⅛ inch thick.
- Carefully transfer it to your 9-inch pie dish, pressing it gently into the edges.
- Trim any overhang, leaving about ½ inch beyond the rim.
3: Roll the Top Crust
- Roll out the second disk into another 12-inch circle if you plan to cover the pie completely.
- Alternatively, cut the dough into strips for a lattice design.
Using Store-Bought Crust
If you’re short on time:
- Thaw the store-bought crust if frozen.
- Place one crust in the pie dish as the bottom layer.
- Use the second crust for the top, either as a full cover or lattice.
Pro Tips for a Perfect Crust
- Keep it cool: Work quickly to prevent the butter from melting. If the dough warms up, chill it again before rolling.
- Repair cracks: Use a little water or leftover dough to seal any cracks.
- Avoid overhandling: Too much handling can make the crust tough instead of tender.
Now that your crust is ready, it’s time to create the star of the pie: the cherry filling. Let me know when you’re ready to continue!
Making the Cherry Filling
The filling is the heart of a cherry pie, and using canned cherries makes it both convenient and delicious. Interested in how other fruit recipes can shine? See the Strawberry Cheesecake Cookie Recipe for another fruity dessert idea.
Step 1: Drain the Cherries
- Open 2 cans (15-20 oz each) of cherries and drain them using a colander.
- Reserve about ½ cup of the cherry juice for the filling.
- Set the drained cherries aside in a bowl.
Step 2: Cook the Filling
In a medium-sized saucepan, combine the following:
- Reserved cherry juice: ½ cup.
- Granulated sugar: ¾ cup (adjust to taste depending on the tartness of the cherries).
- Cornstarch: 3 tablespoons (acts as a thickening agent).
- Lemon juice: 1 tablespoon (brightens the flavor).
- Vanilla extract: 1 teaspoon.
- Almond extract: ½ teaspoon (optional but highly recommended for enhancing the cherry flavor).
Instructions:
- Whisk the ingredients together until the cornstarch dissolves and no lumps remain.
- Place the saucepan over medium heat and stir continuously.
- Cook for 5-7 minutes, or until the mixture starts to thicken. You should see it turn glossy and smooth.
- Add the drained cherries to the thickened mixture, gently stirring to coat them evenly.
- Remove the saucepan from heat and let the filling cool slightly before assembling the pie.
Step 3: Adjusting Sweetness and Consistency
- Too Sweet? Add an extra teaspoon of lemon juice to cut the sweetness.
- Too Tart? Stir in a little more sugar, one tablespoon at a time.
- Too Thin? Simmer the filling for an additional 2-3 minutes until it thickens.
- Too Thick? Add a splash of water or reserved cherry juice to loosen the mixture.
Flavor Tips
- Spices: Add a pinch of cinnamon or nutmeg for a warm flavor twist.
- Boozy Touch: Stir in a tablespoon of Kirsch (cherry liqueur) for depth.
- Butter Finish: Add a small pat of butter (about 1 teaspoon) after cooking for a silky texture.
Make-Ahead Option
You can prepare the filling up to 2 days in advance. Store it in an airtight container in the refrigerator and bring it to room temperature before assembling the pie.
Your cherry filling is now ready to take center stage in your pie! Next, we’ll assemble and design the pie for a stunning presentation. Let me know when you’re ready to continue.
Assembling the Pie

Now that the crust and cherry filling are ready, it’s time to assemble the pie. This step combines your preparation into a picture-perfect dessert ready for baking.
1: Prepare the Bottom Crust
- Transfer the Rolled Dough: Take the larger dough disk (rolled to about 12 inches) and gently place it into your prepared 9-inch pie dish.
- Fit the Crust: Press the dough into the corners of the dish to ensure it fits snugly. Be careful not to stretch it, as this can cause shrinkage during baking.
- Trim the Edges: Leave about a ½-inch overhang around the edges of the dish. You’ll use this to seal the top crust later.
2: Add the Cherry Filling
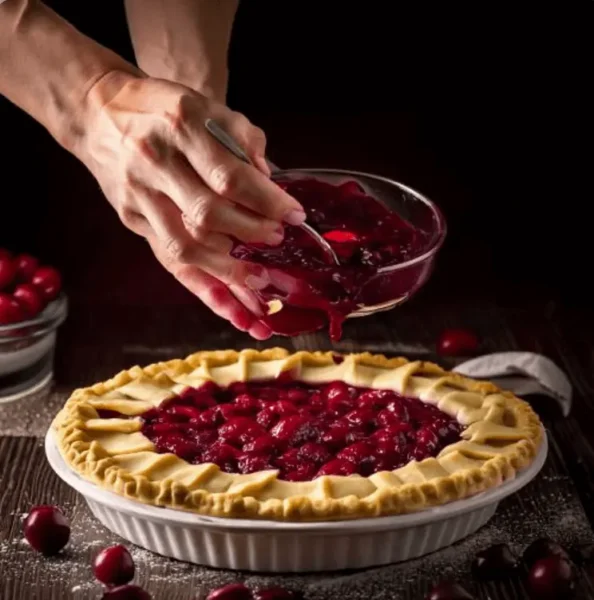
- Spoon the prepared cherry filling into the pie crust, spreading it out evenly.
- Avoid overfilling; leave about ¼-inch of space at the top to prevent spillage while baking.
3: Add the Top Crust
You can choose between two popular options for the top crust:
Option 1: Full Top Crust
- Roll out the smaller dough disk to about 12 inches.
- Carefully lay it over the filling.
- Use a sharp knife to trim the edges, leaving a slight overhang.
- Seal the edges by crimping them with a fork or pinching them into a decorative pattern.
- Cut 3-4 small slits in the top crust to allow steam to escape.
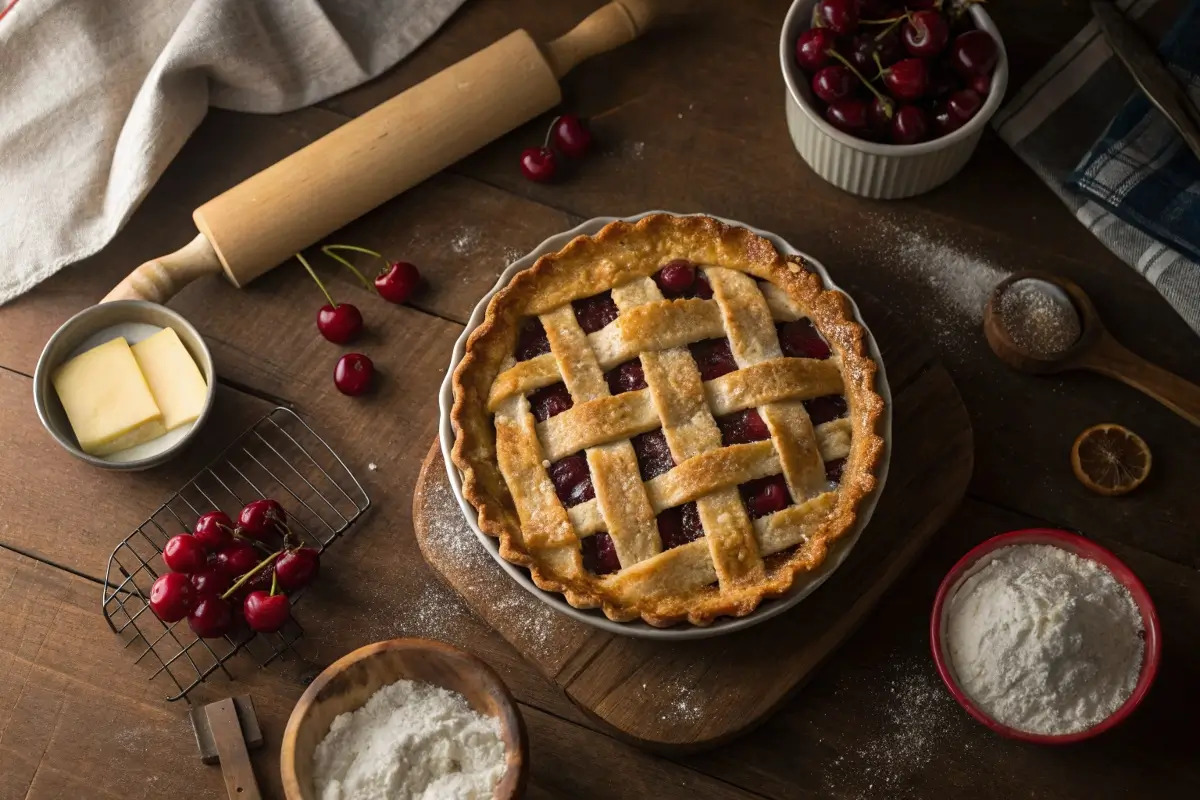
Option 2: Lattice Top Crust
- Roll out the dough and cut it into strips about 1 inch wide using a sharp knife or pizza cutter.
- Lay half the strips horizontally across the pie.
- Weave the remaining strips vertically over and under the horizontal ones to create a lattice pattern.
- Trim the edges and seal as described above.
4: Apply the Egg Wash
- Beat 1 egg with 1 tablespoon of water to create an egg wash.
- Use a pastry brush to lightly coat the top crust. This gives the pie a golden, glossy finish.
- Optional: Sprinkle a little granulated sugar on top for added sparkle and sweetness.
5: Protect the Edges
- To prevent the edges of the crust from overbrowning, cover them with strips of foil or a pie shield. You’ll remove this during the final minutes of baking.
6: Add Decorative Touches (Optional)
- Use leftover dough to cut out shapes like stars, leaves, or hearts and place them on top of the crust. Brush with egg wash for a cohesive look.
With the pie fully assembled, it’s time to bake! The next section will guide you through achieving the perfect golden-brown crust and ensuring your filling sets just right. Let me know when you’re ready to continue.
Baking Instructions
Baking your cherry pie to golden perfection requires attention to detail. Follow these steps for a crust that’s flaky and crisp, with a filling that’s thick and bubbling.
1: Preheat the Oven
- Preheat your oven to 400°F (200°C).
- Place an oven rack in the center position for even baking.
2: Prepare for Easy Cleanup
- Line a baking sheet with parchment paper or foil and place it on the rack below the pie to catch any potential drips.
- This step prevents messes and makes cleanup effortless.
3: Bake the Pie
- Initial Baking: Place the assembled pie on the middle rack and bake at 400°F (200°C) for the first 20 minutes.
- This high temperature helps the crust set and develop its golden color.
- Reduce Heat: Lower the oven temperature to 375°F (190°C) and continue baking for an additional 35-45 minutes.
- Look for bubbling filling and a golden-brown crust as signs of doneness.
4: Remove the Foil or Pie Shield
- About 10 minutes before the pie is done, remove the foil or pie shield from the edges of the crust.
- This allows the edges to brown evenly without overcooking.
5: Check for Doneness
- The pie is ready when the filling is thick and bubbling around the edges, and the crust is a deep golden brown.
- If the crust browns too quickly, loosely tent the entire pie with foil during the final baking minutes.
Cooling the Pie
- Let the pie cool on a wire rack for at least 2-3 hours before serving.
- Cooling is crucial, as it allows the filling to set and prevents it from spilling out when sliced.
Pro Tips for Baking Success
- Temperature Accuracy: Use an oven thermometer if you’re unsure about your oven’s accuracy.
- Avoid Underbaking: If the filling isn’t bubbling, the cornstarch hasn’t fully activated, and the pie may be runny.
- Golden Finish: For an extra golden crust, brush on a second layer of egg wash halfway through baking.
Serving Suggestions
- Serve your cherry pie warm or at room temperature.
- Add a scoop of vanilla ice cream, a dollop of whipped cream, or a drizzle of chocolate sauce for an indulgent treat.
Cooling, Serving, and Variations
Your cherry pie is out of the oven, and the hard part is over. This section covers the final steps to ensure your pie is picture-perfect when served. Plus, explore some fun variations to personalize your dessert.
Cooling the Cherry Pie
- Importance of Cooling:
- Cooling is essential to allow the filling to set properly. If sliced too soon, the filling may spill out, leaving a mess.
- How to Cool:
- Place the pie on a wire rack to allow air circulation.
- Let it cool for at least 2-3 hours at room temperature. If you need to serve it warm, allow at least 1 hour of cooling before slicing.
- Speeding Up Cooling (Optional):
- If you’re in a hurry, place the pie in the refrigerator after it has cooled for about 30 minutes at room temperature. Avoid chilling it immediately out of the oven to prevent condensation.
Serving the Pie
Slicing Tips:
- Use a sharp serrated knife to cut clean slices.
- Wipe the knife clean between cuts to avoid dragging the filling across the crust.
Topping Ideas:
- Classic Pairings: Serve slices with a generous scoop of vanilla ice cream or a dollop of whipped cream.
- Gourmet Touch: Sprinkle powdered sugar over the top or drizzle with a cherry or chocolate sauce for added flair.
- Nutty Addition: Garnish with toasted almond slices to complement the almond extract in the filling.
Variations of Cherry Pie
1. Double-Crust Cherry Pie
- Opt for a fully covered top crust instead of a lattice for a traditional look.
- Add decorative vent holes in shapes like hearts or stars.
2. Mini Cherry Pies
- Use the same recipe to make individual pies using a muffin tin. Roll the dough into smaller circles and divide the filling evenly among the cups.
3. Cherry-Almond Pie
- Enhance the flavor by mixing ½ cup of ground almonds into the crust dough.
- Sprinkle slivered almonds over the top before baking.
4. Chocolate Cherry Pie
- Add ½ cup of mini chocolate chips to the filling before assembling the pie.
- Pair with a chocolate-drizzled lattice crust for a decadent twist.
5. Rustic Cherry Galette
- Roll the dough into a large circle and place the filling in the center.
- Fold the edges over the filling, leaving the center exposed, for a free-form pie that’s easy and elegant.
6. Low-Sugar Version
- Replace some of the sugar in the filling with a natural sweetener like honey or stevia.
- Use unsweetened canned cherries for a tart and healthier option.
Storage and Reheating Tips
Storing the Pie:
- Room Temperature: If the pie is to be eaten within a day, cover it loosely with foil or plastic wrap and keep it at room temperature.
- Refrigerator: For longer storage (up to 4 days), cover the pie tightly and refrigerate.
Reheating the Pie:
- Oven Method: Preheat the oven to 350°F (175°C) and warm the pie for 10-15 minutes.
- Microwave Method: Heat individual slices on medium power for about 20-30 seconds.
Freezing the Pie:
- Fully baked pies can be frozen for up to 3 months. Wrap them tightly in plastic wrap and then aluminum foil. Thaw in the refrigerator overnight before reheating.
In the next and final section, we’ll summarize the key steps, share common mistakes to avoid, and address frequently asked questions about cherry pie with canned cherries. Let me know when you’re ready!
Common Mistakes to Avoid and FAQs
Now that your cherry pie is ready, it’s important to know what to avoid next time and to address common questions about making a perfect pie with canned cherries.
Common Mistakes to Avoid
1. Not Draining the Canned Cherries Properly
- Excess liquid can make the filling too watery, leading to a soggy bottom crust. Always drain the cherries thoroughly and only use the reserved juice as directed.
2. Overworking the Dough
- Handling the dough too much can make the crust tough instead of flaky. Be gentle during mixing and rolling.
3. Skipping the Cooling Step
- Cutting into the pie while it’s still hot can cause the filling to run out. Cooling allows the filling to set and slice cleanly.
4. Uneven Baking
- Failing to shield the crust edges can lead to overbrowning. Use a pie shield or foil to ensure even baking.
5. Ignoring Baking Time
- If the filling isn’t bubbling, the pie hasn’t baked long enough. This bubbling ensures the cornstarch has fully activated to thicken the filling.
6. Inconsistent Crust Thickness
- Rolling the dough too thin may cause it to tear, while rolling it too thick can result in uneven baking. Aim for about ⅛ inch thickness.
Frequently Asked Questions
Q1: Can I use fresh cherries instead of canned?
- Yes, you can use fresh cherries. Simply pit and measure them to replace the canned cherries. You may need to adjust the sugar based on the sweetness of the cherries.
Q2: How do I prevent my pie crust from getting soggy?
- Brush the bottom crust with a light layer of egg wash before adding the filling. This creates a barrier that prevents the juices from soaking into the crust.
Q3: Can I make this pie gluten-free?
- Absolutely! Use a gluten-free all-purpose flour blend for the crust. Ensure the cornstarch is labeled gluten-free as well.
Q4: How do I adjust the sweetness of the pie?
- If you prefer a less sweet pie, reduce the sugar to ½ cup. For a sweeter pie, add an extra tablespoon of sugar to the filling.
Q5: Can I prepare the pie ahead of time?
- Yes! You can assemble the pie and refrigerate it unbaked for up to 24 hours. Alternatively, bake the pie and store it for up to 3 days, reheating before serving.
Q6: What should I do if my filling is too runny?
- If the filling seems too watery after cooking, mix an extra tablespoon of cornstarch with a small amount of cold water and stir it into the filling. Cook for an additional 1-2 minutes to thicken.
Making a cherry pie with canned cherries is a rewarding and approachable baking project, perfect for any occasion. By following this canned cherry pie recipe step-by-step, you’ll create a pie with a buttery, flaky crust and a flavorful filling that’s just the right balance of sweet and tart. Whether you’re serving it warm with ice cream or enjoying a slice on its own, your homemade cherry pie is sure to impress.
Don’t forget to experiment with the variations and customize the pie to your taste. With practice and a little creativity, this canned cherry pie recipe can become your signature treat. Happy baking!

